God Bless America!
N1NKM's

J64 page |
 |
Here is some info on how to "hack" the Commodore 64 DTV joystick. :)
Created: 11/30/2004
Updated: 12/03/2004
Updated: 10/20/2007
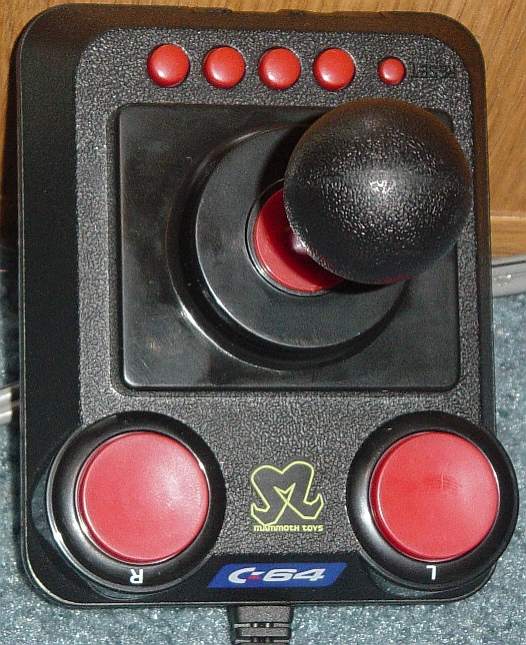
BELIEVE IT OR NOT,
THIS is a REAL C=64!!!
YES, this tiny joystick actually houses a 21'st century version of the Commie 64! For all appearances, it looks to be a complete implementation of the C64, SID Chip and all! Most sites call this the DTV, but that seems to be getting confused with Digital TV, or DirecTv, so on this site, I will refer to this device as the "J64". (Joystick 64) It runs on 4AA batteries, and connects to the Audio and Video inputs on any modern TV or VCR. I bought it for about $35 (incl. shipping) from QVC.COM but it may be available elsewhere. (I hope it is! It's pretty cool!) Although it's not 100% true C=64, it is VERY CLOSE! The only programs I can't run on it are ones that replace the C= Kernal & BASIC ROMS with customized ones. Disk speed-up utilities also don't work.
| What's inside! |
|
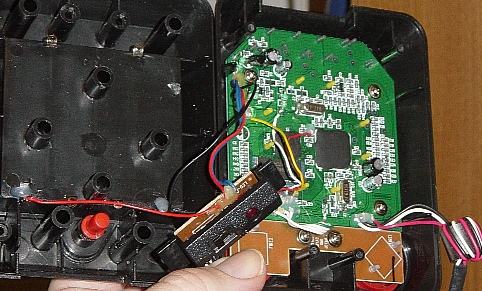
Here's what's "under the hood"... 2 epoxied chips, and a few others. All surface-mount, of course. The thing resting on my big thumb is the power switch and LED. The battery compartment is in the bottom half of the unit, on the left in this picture. The crystal is 28 Mhz!
A closer look!
| The whole circuit!! (Bottom) |
|
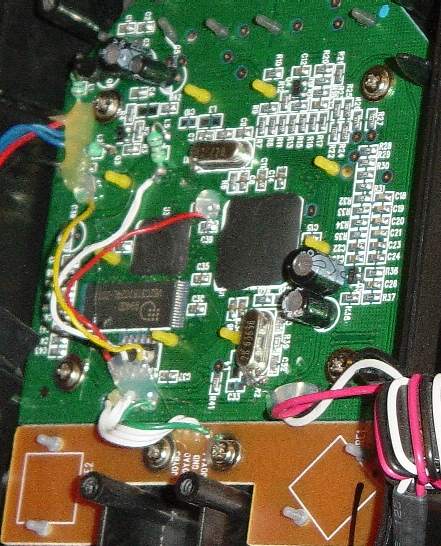
The brown board at the bottom is the two "fire" buttons. The White, Magenta, and black wires are the Video/Audio/Ground wires, wrapped around a torroid. They end with a pair of RCA jacks, which plug into the Audio & Video inputs of a TV or VCR. When you first power this thing up, you are greeted by the familiar blue C64 BASIC screen... which then proceeds to "type" onto itself...
LOAD"*",8,1
READY
RUN
Then the game selection menu screen appears.
Here is a LARGE IMAGE of the above.
A closer look!
| The button side (top). |
|
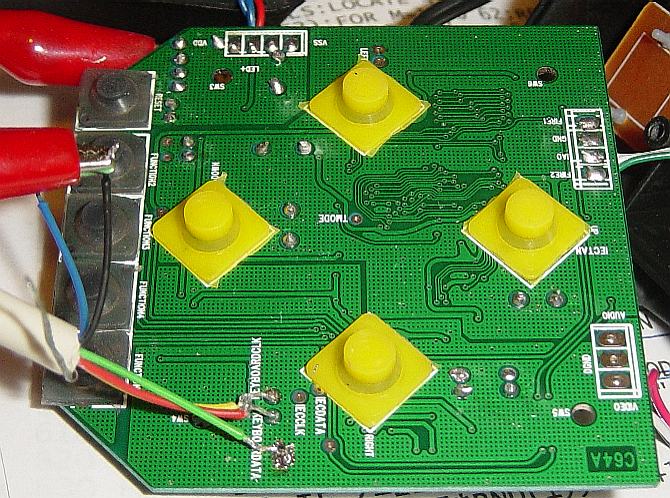
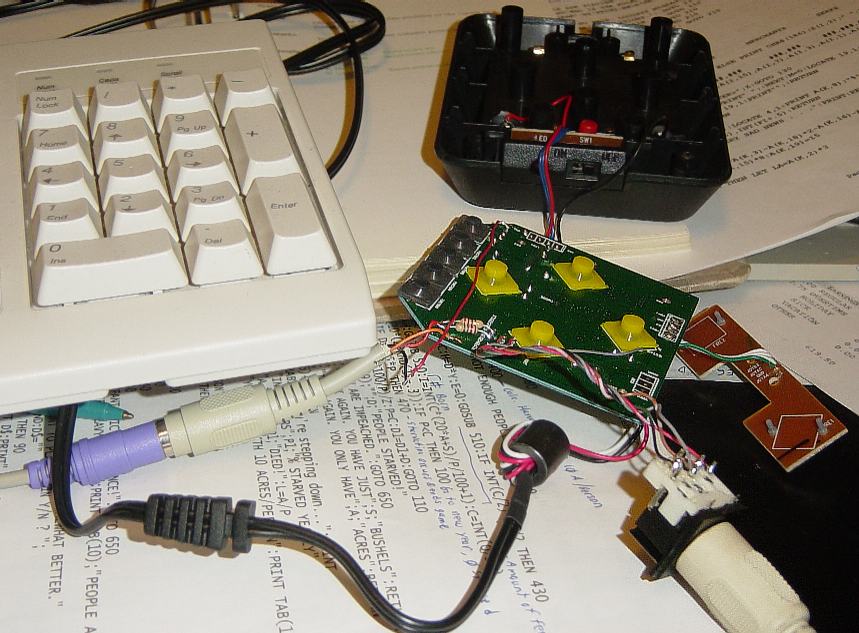
Here, I hooked up a keyboard. It looks like Jeri wanted us to be able to "hack" this thing. ;) Look at how nicely silkscreened the connections are! Although the yellow & red keyboard wires LOOK like they are touching, here, they are not. On another site, I read that you need to repeatedly press the letter "K" to get this thing to drop to BASIC, and sure enough, that works! You have to do it BEFORE the big C= logo appears, though, and sometimes you have to press RESET more than once. Holding it for a few seconds, then repeatedly tapping the "K" as soon as you release it seems to work best. It usually takes more than one try. Some keyboards work better than others.
Note that at first, the keyboard will send a letter V when you release the key. You need to keep pressing "K" and other random keys until it starts responding normally. Apparently, the CPU needs to sync itself to the keyboard, and once it does, it works fine.
NEW INFORMATION!
You can also make this thing drop to BASIC without even opening it up!!! Just wiggle the joystick back and forth as it is booting up! If you LOAD"$",8 and LIST it, you will see some useful programs! One of them is a joystick-operated on-screen keyboard! You can tinker without even opening the case! HOW COOL IS THAT?! :)
(There is some more info, below.)
Does anyone know what that "TMODE" connection in the center of the board is for?
The connections labelled "IEC..." are the terminals for connecting serial devices, like disk drives, etc. Note that one of them is hidden under the "UP" joystick button's rubber pad. (Yellow thing on right in this pic.)
Here is a LARGE IMAGE of the above.
EUREKA!!!
| Keyboard & Disk working! |
|
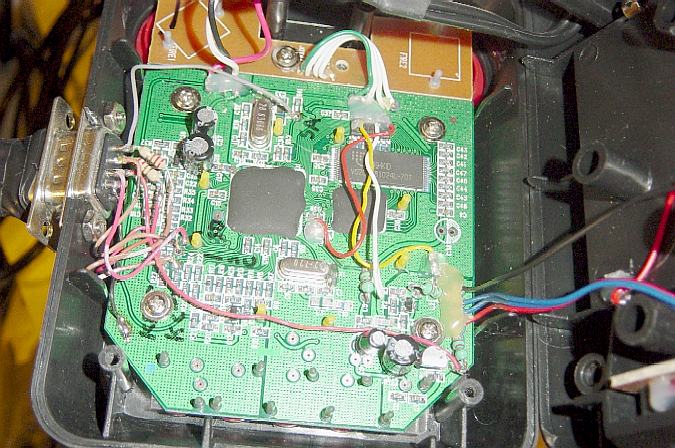
Final test results: SUCCESS!!!! By adding 220 ohm resistors to each line of the keyboard, perfect functionality was obtained! Hooray! I also connected a 6-pin C= DIN connector, (lower right corner of pic) and plugged in my 1571 drive. This baby works!! However, the implementation of the Commie 64 is NOT EXACT, because my special CUSTOM BASIC will not run... apparently, they had to make some significant mods to the C= ROMS, and thus my modded images crash when loaded. OH WELL. BASIC programs work fine, though! :)
I just think that this whole thing is totally amazing... a nearly perfect Commie 64 on a board the size of a playing card, and it runs on 4 AA batteries, keyboard & all! NOTE: Use NiCd (or NiMh) batteries, because they will give you 5 volts, not 6 like Alkaline cells would.
Now to make everything all nice & neat...
Tidy it up!
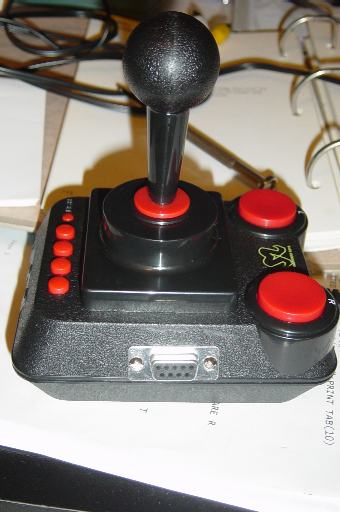
| A new way to connect! |
|
This is the DB-9 connector I used to bring the Keyboard & Disk lines out of the unit. Note that there is *PLENTY* of room inside to add this connector & the wires! I had to push them close to the side, because of a plastic "pylon" which meets the PC board just beyond the connector. (Provides support under one of the joystick's buttons.)
Here is a LARGE IMAGE of the above.
It's FINISHED!!!
| DB-9 connector view! |
|
READY TO GO! With the DB-9 connector installed, now I can load up any game I want (from disk, or a D64 image on the PC) then unplug it, and play away. :)
A new game!
| Screen shot of "Froggee" |
|
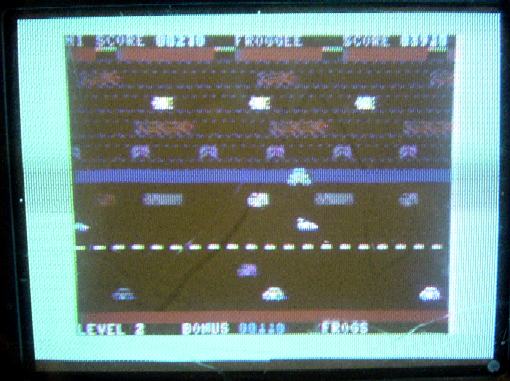
This is a knock-off of the 1980's Arcade classic, Frogger, called "Froggee". (This is a pic taken from my little 5" TV, thus the poor resolution.) Gameplay is similar to the original, but the SFX stink. It's only used here as a quick demo of how we can modify this thing and load (almost) anything we want into it! With the DB-9 connector, now I can load any game, then unplug and carry it out to the big TV in the living room for some serious retro-gaming! :)
MORE HACKING INFO! :)
WEB Archive of DTV Hacking info
Take me HOME...
Legal Notes: The C= logo and name "Commodore" are (were?) trademarks of Commodore USA, LLC (Facebook Page). (This was the LAST KNOWN owner of the copyright. They now appear to be out of business. The only link available is that fan page on Facebook.)
These trademarks are only used here for reference purposes. Also note, that opening your unit will void the warranty (if any). User assumes all risk for use of the information presented here.